Overview
Docker is a powerful container solution for apps of all kinds. In this blog, we’re going to go over Docker and it’s benefits, as well as how to make your first container.
Intro to Docker
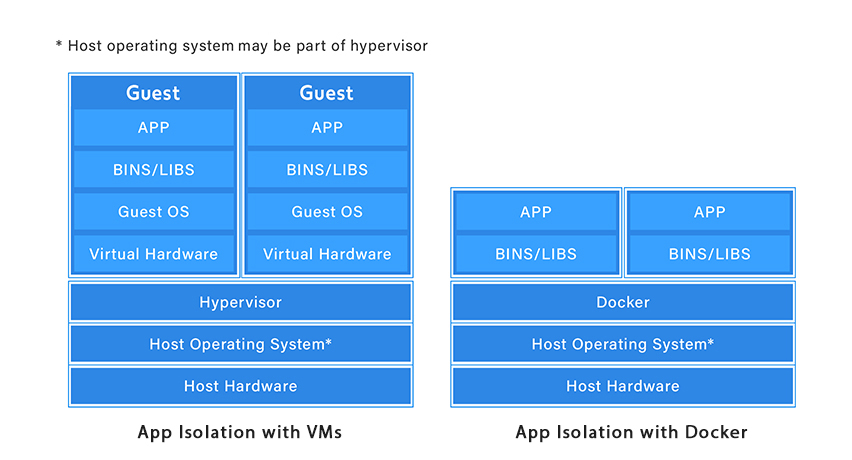
If you want to deploy an app in a ready-to-go package, chances are you’re going to want an isolated, sandboxed environment to avoid problems. A typical solution to this is a virtual machine- which, as you may know, is an entire operating system and virtualized hardware running on top of the host system. VMs are incredibly important, and if you’ve done anything with web servers, there’s a good chance everything was running on a virtual machine, even if you weren’t using a VPS.
Virtual machines can often lead to a lot of bloat-wasted space, memory, and CPU power. Enter Docker. Instead of running an entire instance of a guest operating system for your isolated environment, it takes advantage of the host’s kernel, adding whatever bins/libs are needed and the apps on top. Because Linux distros are based on a common kernel, this allows portability of the docker container without any changes needed to the host OS.
This provides a huge performance benefit. Docker containers are lightweight, and you can run many on one system with no problems, or even run containers inside containers, a common practice. They start in seconds, have incredibly small file sizes, and community images for common tasks can be pulled from and added to with just a few lines in a Dockerfile.
The container is the running instance of Docker, created by an image, which serves as instructions on how to build the container’s environment. This means the image everything from the OS’s configuration that the app needs to run, the application you want to run, and any software needed to run it, all in one file. In practice, all you’d need to deploy a custom container ready to serve your project is a simple text file you’ve configured, and the project files you want it to run.
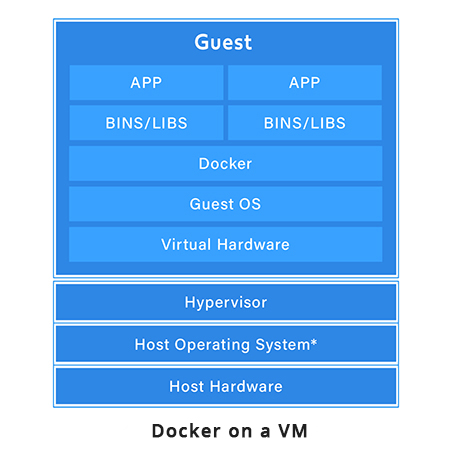
Often, Docker is run on top of a virtual machine, especially when the app is in the development phase. You might need something configured on the operating system level, like a firewall configuration or something else critical to the app’s operation, while needing to remain portable and consistent between differing infrastructure. Running Docker on top of a Guest OS does not defeat the purpose. It still isolates the apps from each other, and allows quick configuration and changes to be made on the fly.
Setting Up Docker on the Host Machine
We’re going to assume you’re on a Debian based Linux distro (like Ubuntu). If you don’t have a local installation or virtual machine to work with, head over to a VPS provider like Vultr or DigitalOcean and grab an Ubuntu VPS.
In terminal (or over an SSH session) run these commands :
sudo apt update sudo apt install docker.ioThat’s it, Docker is installed. Let’s start it. It’s a service, so we’ll need to start it like this-
sudo systemctl start dockerThis will start it once, but while we’re here, let’s also make sure it starts every time the machine is booted
sudo systemctl enable dockerNow that we should have it started, let’s check the Docker version to make sure it’s all working.
docker --versionWe should get a line that looks like this
Docker version 18.09.7, build 2d0083dBuilding Your First Docker Image- Basic PHP/Apache installation
For your first Docker image, we’re going to make an image for PHP and Apache, a common setup everyone should be familiar with (pretty much a LAMP stack without a database)
First, you’re going to be making some files. I won’t go through how to create and edit files in Linux command line, so if you’re uncomfortable with that and want a GUI, use an FTP client like Filezilla or WinSCP.
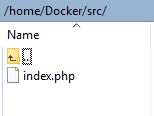
Make a folder where you want and name it whatever you wish. I named it “Docker” and placed it inside the home directory. In that folder, make a subfolder called ‘src’. In src, make a new index.php file so we have a web page to display from out Docker container.
Place this inside the file so the webpage will display something.
<?php
    echo "It works!";
    ?>
Save this file.
Making the Docker Environment
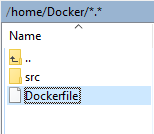
Now, we’re going to make our Dockerfile. In the root of our project directory (above src), we’re going to make a new file called “Dockerfile” with no extension.
Making a custom Dockerfile doesn’t mean you have to piece everything together yourself, instead you can take an existing file the Docker Hub and build on top of it, and that’s what we’re going to do!
We’re going to grab one of the official PHP images from here. We’re going to want the Debian based version with Apache for this demo. We don’t need to download anything here, this page just provides the names of the images we want.
In our Dockerfile, the ‘FROM’ keyword will specify something we want to import. In this case, it’s php:7.2-apache, which will import a docker file with all the things this setup needs, which itself will pull all of the software needed for PHP and Apache.
FROM php:7.2-apache
The next line will specify where the directory that will contain all of your PHP files will go, using the ‘COPY’ keyword. The first directory is where you’re copying from (your src folder) and the second is where it will go on the Docker container.
COPY src/ /var/www/html/
Next, we need to make sure port 80 is listening so we can actually serve web pages. We’ll use the ‘EXPOSE’ keyword for this.
EXPOSE 80
This is what your completed Dockerfile should look like:
FROM php:7.2-apache
COPY src/ /var/www/html/
EXPOSE 80
Now, open terminal and change directories to inside your Docker project folder, wherever you put it. In my case
cd home/DockerNow run
docker build -t helloworldI chose the name helloWorld, but you’re free to name it as you want. Make sure to include the period, as it specifies that we’re working with the current directory. It’ll download everything it needs to run the image.
.png?updated_at=2023-07-26T10:06:38.179Z)
Now let’s run it!
docker run -p 80:80 helloworldThe -p flag will allow you to forward port 80 for this app.
Go to a web browser, navigate to “localhost” (or the IP of your VPS if that’s what you’re using), and you should see your test text!
.png?updated_at=2023-07-26T10:06:37.289Z)
Working with Volumes
Let’s go back to our index.php file and make a small change
<?php
    echo "It still works!";
    ?>
Save it, and refresh your test page in the browser.
Looks like it didn’t update. This is because when your Docker container is built, it copies this file into the Docker image and runs it from there. You’d have to rebuild your image to update it!
We can make changes without rebuilding the image using ‘volumes’. One type of volume shares between multiple Docker containers, and one shares between a container and the container’s host. We’ll be using the latter.
Go back to terminal on your Linux machine, and stop the execution of Docker (ctrl+c).
We’re going to run our image again, but this time with a local folder mounted inside the image. We do this using the ‘-v’ flag. We’ll be mounting the SRC folder, and the path we need to give it needs to be a full path, not a relative path. Here’s what our test one would look like:
docker run -p 80:80 -v /home/Docker/src:/var/www/html helloworldGo back to the browser and refresh the page.
.png?updated_at=2023-07-26T10:06:37.510Z)
Update the index.php file again, and you’ll see changes right away!
.png?updated_at=2023-07-26T10:06:37.495Z)
Conclusion
We hope this basic tutorial has helped you get started with the wonderful tool that is Docker. If you’re already a Docker expert and are interested in joining our Indian team, we currently have software engineer jobs in Kolkata. We’re always growing, and looking for the best talent to join our team!

Similar Reads
How can we help?
Tell us about your inquiry and we’ll get back to you as soon as we can.